
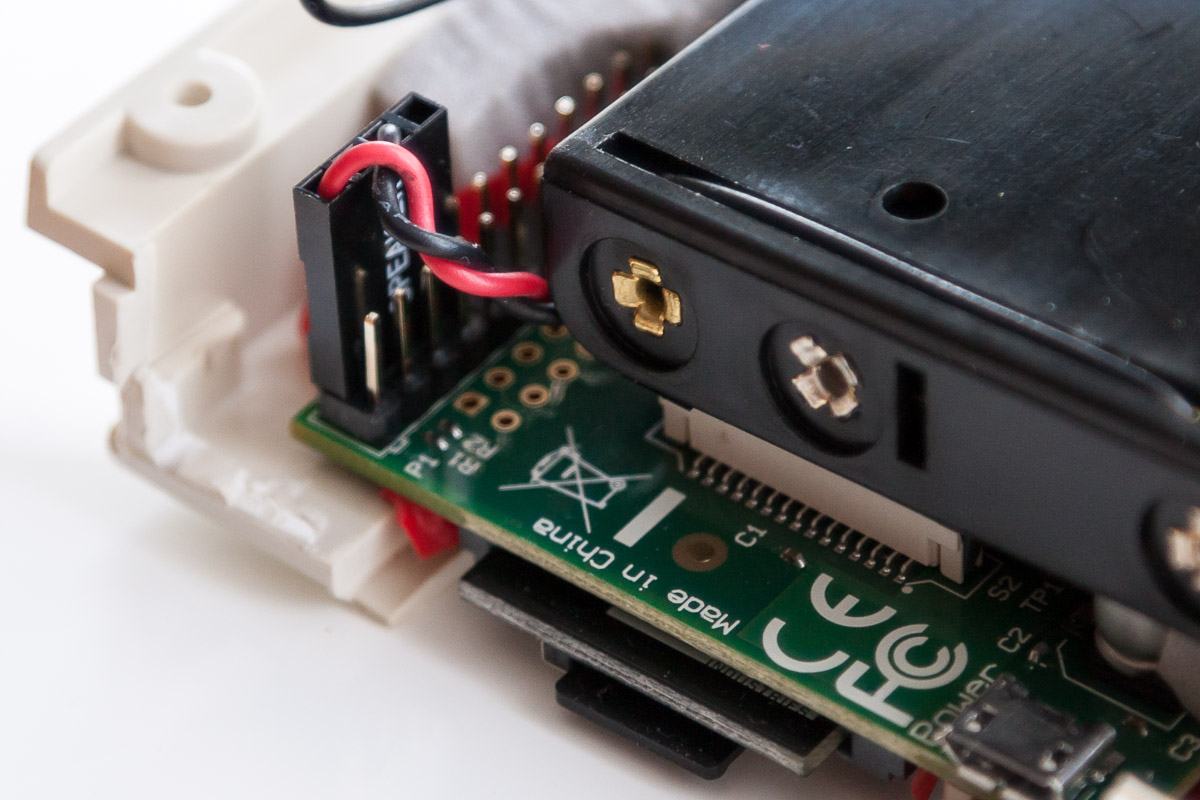
I believe I’ve got about as far as I’m going to get with this year’s Retrochallenge. The last push was to incorporate the pack of four AAA rechargeable batteries inside the cartridge case of the Epson PX-4 along with the Raspberry Pi.

Pi & Power Pack Fitted
This was simply a case of replacing the battery holder I had with a much thinner model. It’s pretty cramped inside the case and I would be concerned about running the Pi for any length of time in terms of heat build up, oh and it’s not pretty in there. I’ve resorted to my usual over reliance on insulating tape.
I salvaged a small switch from one of my children’s toys and wired it in so that I could turn the Pi on and off easily. As I mentioned in my previous post I’m now running the power straight in to the Pi’s GPIO header.
The NiMh AAA batteries that I’m using are 1.2V / 1000 mAh and are ideally suited. However there’s no in-built protection for the Pi when powering via the GPIO so you have to be careful.
Power Via The GPIO
The only fly in the ointment left is the bundle of cable that consists of the USB to RS232 adapter and the PX-4’s serial cable. This is an unsightly mess and it may be the case that the serial communications could he handled by the Epson’s cartridge port interface.
That however is only an assumption as I don’t have the full technical details for the interface. There’s also another possible use for this set-up and that’s running Vfloppy, a disk simulator for the Epson PX-4 and PX-8.
With the Pi set to auto logon, start TCPser and connect to my WiFi I can quickly launch Term on the PX-4 and connect to my BBS. From there my main weapon is email.
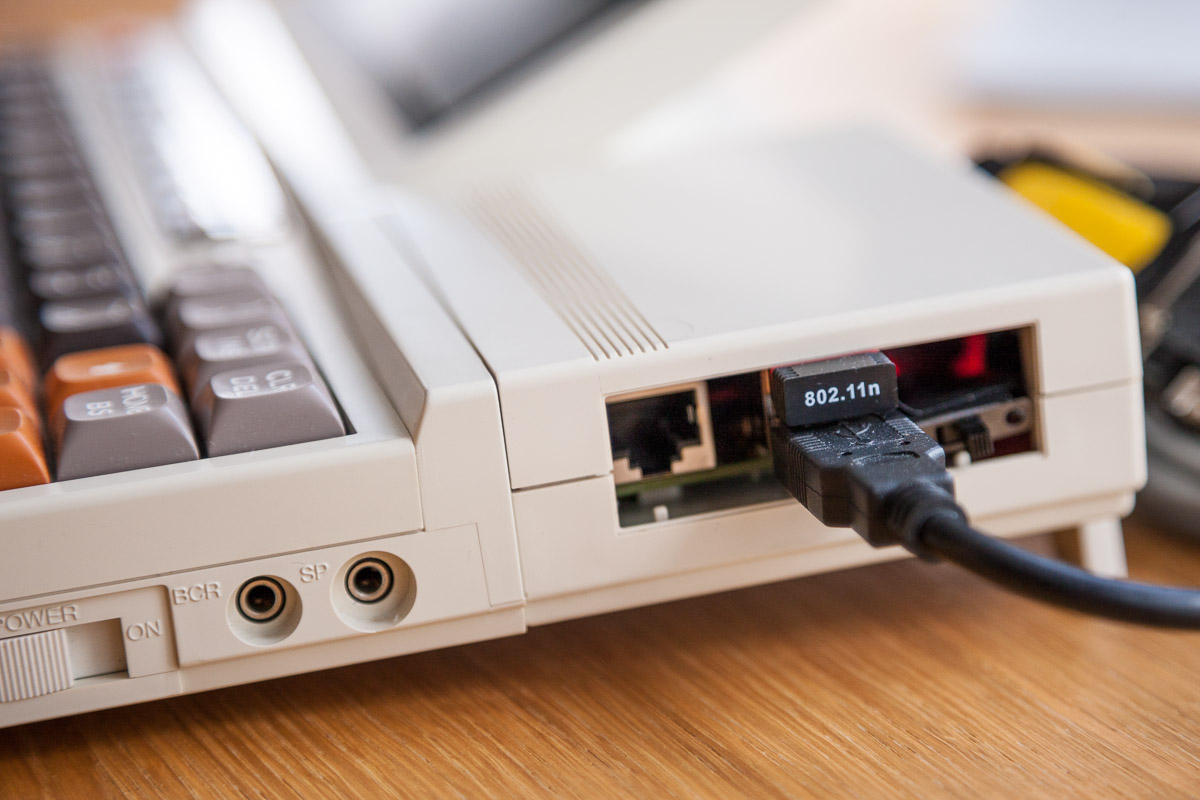
Fitted To The PX-4
Using the IFTTT service I can blog, Tweet, SMS and post Facebook updates all via email and therefore from the PX-4. I can also receive notifications from these services via email and can therefore also access them with the Epson.
The limited screen is obviously not ideal, however it gets the job done. There is another alternative, the cartridges are also compatible with the MS-DOS based Epson PX-16 which has a much larger screen whilst remaining light, compact and battery-powered.
I’ve enjoyed the journey, however pointless the end result it’s just been fun and I’ve learned a few things about the Pi and the PX-4 and even some basic electronics.

Epson PX-16
I would have liked to have made a video of the machine in use at an Internet enabled coffee-house or such like, just for the hell of it, but I don’t think I’ll have time. I might instead just try a quick clip of me using it in the garden.
