Tough, rugged, angular, ugly… that’s enough about me, my Husky Hunter 2 has arrived. I’ve lusted after some military computing hardware ever since I first saw the GRiDCase controlled remote sentinels in Aliens SE. I’ve yet to come across an affordable GRiDCase but was pleased to catch this Husky instead.

Husky Hunter 2
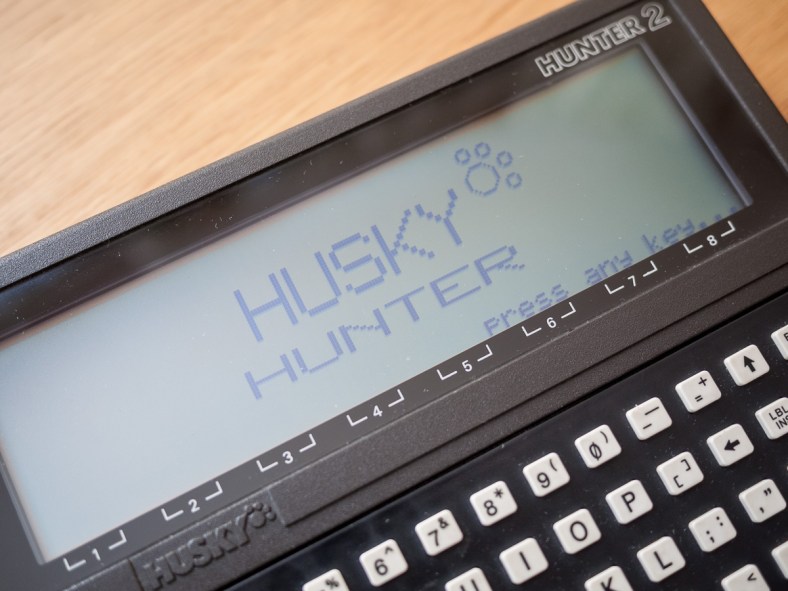
Running the CP/M 2.2 compatible Demos this British made machine is physically designed to handle some serious abuse, an Epson PX-8 pimped by Lucius Fox if you like. Built by Husky Computers of Coventry and introduced in 1984 the unit runs an NSC800-4 Z80 compatible CPU and runs on four AA batteries.
Base RAM specification was 128K althoughup to 726k could be added. Ports are limited to one DB 25 RS 232. There’s a circular 4 pin power connector on the back.
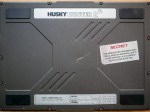
Back of Unit
After inserting four AA batteries I was initially unable to start my Hunter so I had a quick peek inside to check that the backup battery hadn’t leaked and fortunately it was fine, there was also a large pack of silica gel in there for moisture protection. On reassembly the unit powered up and a quick bit of research online revealed that the backup battery needs to draw some juice from the AAs before the Hunter will power on.
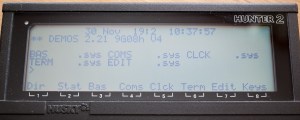
System Menu
On boot you’re presented with a splash screen and press any key prompt, doing so takes you to the main screen and command prompt. There are eight pre-defined keys selected by pressing the CTL/FN button with numbers one to eight. One and two are the familiar CP/M commands DIR and STAT, three starts BASIC, four allows you change the communication protocols for the RS 232 port. To set the clock select five, six launches a terminal software, seven the Edit command and finally eight allows you to toggle to another set of options including Inp, Save, Type, Ren and Send.

Secret Warning
My Hunter has arrived with a rather fetching ‘Secret’ sticker on the back warning that ‘This Winchester has been used for classified material and is to be treated I.A.W. current regulations in BR 4005‘ so there! Of course any information that may have been held in the RAM disk is long gone, indeed issuing the DIR command would initially crash the Husky every time until I formatted the drive. I’m aware that ‘Winchester’ became synonymous with any make of fixed disk but I’ve not seen it used to describe a RAM disk before.
There’s a very useful unofficial Husky Hunter 2 wiki here for which I am unable to identify the author but whoever you are I am very grateful for your efforts. From there I downloaded the HCOM file transfer utility and followed the excellent instructions* provided for installing it on the Hunter. I ran the DOS client on my Windows XP box and the two machines were soon talking to each other via null modem.

Connecting With HCOM
I transferred over a copy of the CP/M version of Level 9’s Snowball which ran well, albeit with the need to horizontally scroll backwards and forwards to read the text.
I also took the opportunity to try the built in terminal software to connect to my BBS Nostromo which allows local connections via null modem and this worked without issue.
The built in BASIC interpreter is apparently quite powerful so I may have a dabble with that, meanwhile I’ve added some more images and links to resources below. Oh and I’ve just realised my model has a backlight, cool, but not very bright.

Battery Compartment & RS 232 Port
Left Side, Tripod/Strap Socket

Serial Number

Husky Hunter 2
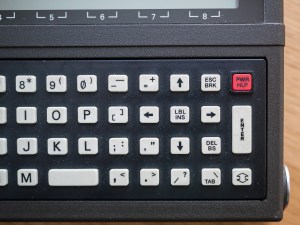
Keypad
* This page no longer exists though I have linked to the Internet Archive Copy. I also included below the instructions for installing and using HCom.
HUSKY File Transfer Utility
Description
The HCOM programs allow the Husky Hunter 2 to communicate with the HCOM for Windows or HCOM for MS-DOS program. HCOM is a file transfer utility designed for use with the full range of Husky rugged hand-held computers. It uses an interface similar to File Manager and will operate on MS-DOS and all Windows platforms including Windows 3.1x, Windows 95, Windows NT (3.51 and 4.x) and Windows XP.
Note: Transferring files from the Husky Hunter 2 to the Windows PC does not appear to work when running under Windows XP.
Features
HCOM for Windows offers the following features:
- Ability to communicate with all Husky hand-held computers.
- Transmit and receive files using a point and click user interface.
- Easy file management of connected hand-held computers.
- Compatible with MS-DOS and Windows 3.1x, 95, NT 3.51 and NT 4.x
- The use of channels allows multiple file transfers simultaneously.
- Command-line parameters provide compatibilty with MSDOS version.
- Synchronisation of hand-held clock with PC calendar.
- Programmers API available for seamless application integration.
Download
hcomw.zip – HCOM for Windows and MS-DOS
Installing HCOM on the Husky Hunter 2
If the HCOM program is not installed on the Husky Hunter 2, it must be downloaded and installed from the PC running HCOM for Windows/DOS.
- Connect the Hunter to a serial port on the PC.
- Open a channel using HCOM for Windows/MS-DOS using the same serial port.
- Select the Session / Software Download option and choose Hunter from the list of machines.
- On the Hunter ensure that the communications parameters are set as follows (type COMS at the DEMOS prompt to start the serial port configuration program):
Transmission Parameters
Rate – 2400 Prtcl – none Pty – 8bit
CTS – n DTR – n LF – n Echo – n T/O – n Null – 0Receiving Parameters
Rate – 2400 Prtcl – none Pty – 8bit
RTS – off DSR – n DCD – n T/O – n Serig – off
- On the Hunter, type the command ”INP 999 HCOM.COM”. The screen should now display ”Waiting”.
- On the PC select the OK button to start the transfer. The Hunter screen should now display ”Loading”.
- When the transfer is complete press ESC (Shift-BRK) on the Hunter to save the software to disk. The Hunter screen should now display ”Aborted”.
- Run HCOM on the Hunter and select the Reconnect option on the PC. The directory of the Hunters disk should now be displayed.
Using HCOM
Start HCOM on the Husky Hunter 2 by running the HCOM command. The following screen will be displayed:
:========================================:
: HUSKY File Transfer Utility V1.0.1 :
: (C) Copyright Husky Computers Ltd :
:========================================:
press ESC to exit.
You can now connect to the Husky Hunter 2 using HCOM for Windows.
To exit the HCOM program press the ESC key (Shift-BRK).

Got one at work, used regularly since new as a data logger for surveys. Out in all weathers in all conditions and still works like new. It just wont stop working. Memory is small but holds a full days surveying information.
LikeLike
Hi William, I know this is a long shot but you wouldn’t happen to be able to send me a copy of the software you use for the logging on the husky for your surveying? I ask because I’m currently fixing up my dad’s husky that was used as a logger for his Pentax theodolite, the internal battery had failed which meant I had to format the husky and start from fresh.
Cheers, Allan
LikeLike
Alan,
Unfortunately the Husky was retired about a year ago along with any software we had.
LikeLike
does anyone know where there is a Husky Hunter for sale
LikeLike
Have some Husky Hunters, used by Forestry Department, can make you a deal on all I
have left.
LikeLike
Hi Roman, how many do you have, cost, condition?
LikeLike
Can you give me hcomw.zip this file
LikeLike
Yes I can e-mail it to you.
LikeLike
Has anyone found keyboard overlay software preinstalled on the hunter? I have a newly restored Hunter 1, but that shipped with a Hunter 2 keyboard layout. Now the cursor keys doesn’t match, F keys are where numbers should be etc.
Any ideas?
LikeLike